Fact-checked by the SnapMessages editorial team
Quick Answer
Every iPhone running iOS 11+ and every Android phone running Android 11+ has a free, built-in screen recorder that requires no app download. Add it to Control Center on iPhone (Settings > Control Center > Screen Recording) and tap to start. On Android, swipe down twice to Quick Settings and tap the Screen Record tile. Beyond gaming clips, the tool has genuine wellness uses: recording telehealth calls for recall, capturing physical therapy demos, and archiving health dashboard data. The catch: HIPAA does not protect recordings once saved to your personal camera roll, and 11 U.S. states require all-party consent before you record a conversation, so disclosure and cloud-sync settings matter as much as the recording itself. As a rule of thumb, the recording is worth the setup time whenever a session covers more than one instruction you’d need to remember later, a medication change, a dosage, a follow-up date. For a single quick “you’re fine, see you in a year” checkup, don’t bother.
Updated July 2026
According to Harmony Healthcare IT’s 2025 research, Americans now spend an average of 5 hours and 16 minutes on their phones every day, a 14% increase from the prior year. Buried inside nearly every one of those devices is a built-in screen recorder that the vast majority of owners have never opened. The feature ships standard on every iPhone running iOS 11 or later and every Android device running Android 11 or later, yet most guides treat it as a gaming or tech-demo tool. Real phone screen recorder tips go beyond the basics, and the wellness applications alone make the feature worth learning properly: telehealth appointments, fitness walkthroughs, medication schedules, symptom logs. The use cases are specific and the stakes can be genuinely high.
The patient recall problem in healthcare is well-documented and striking. Research cited across healthcare law and patient-safety literature consistently finds that patients can forget up to 80% of what was discussed during a medical appointment, often within minutes of leaving the consultation. That figure is alarming on its own, but it becomes especially relevant when you consider how easily a five-minute screen recording could serve as a clinical safety net. The privacy picture, meanwhile, is complicated. The U.S. Department of Health and Human Services explicitly states that HIPAA Rules generally do not protect health information stored on a personal cell phone or tablet, meaning if you record a telehealth session and save it to your camera roll, securing that file is entirely your responsibility, not your provider’s. Most how-to guides for screen recording never mention this. Most readers have no idea. Much like the way the Consumer Financial Protection Bureau (CFPB) draws a hard line around who is responsible for protecting consumer data once it leaves a regulated institution’s system, the line here is just as sharp: once a recording lands on your device, no federal health privacy rule follows it.
This guide covers what you need to use your phone’s built-in screen recorder with confidence: how to turn it on for both iPhone and Android, the wellness use cases that actually justify using it, the pre-recording checklist that prevents the most common mistakes, and the legal and privacy considerations that could genuinely affect you. By the end, you will know how to set up, record, and manage screen recordings in a way that is clean, purposeful, and secure.
Key Takeaways
- Americans spend an average of 5 hours 16 minutes per day on their phones in 2025, a 14% year-over-year increase, yet most never use the built-in screen recorder once.
- Patients forget up to 80% of medical appointment information, making screen recording of telehealth visits a documented recall safety measure, not just a convenience.
- Recording at 1080p consumes approximately 10–15 MB per minute; a 20-minute telehealth session can produce a 200–300 MB file that may auto-upload to a shared cloud account if sync is enabled.
- HIPAA does not protect health information stored on a personal phone, the user, not the provider, is fully responsible for securing any screen recording of a medical session.
- Eleven U.S. states (including California, Florida, and Illinois) require all-party consent before recording a conversation; recording a telehealth call without disclosure can constitute a felony in those states.
- A 2023 IAPP report found that 37% of third-party Android screen recording apps requested access to SMS or call logs, permissions with no legitimate screen-capture purpose, compared to zero such permissions required by native OS recorders.
- Decision threshold: record a health-related session if it covers more than one piece of information you’ll need later (dosage, timeline, follow-up step). Skip it for single-item, low-stakes check-ins where a quick note will do the same job.
In This Guide
- Why Your Phone’s Screen Recorder Is a Genuine Wellness Tool
- How to Turn It On: iPhone vs. Android in Plain Language
- Five Wellness Uses Worth Recording Right Now
- Before You Hit Record: The Pre-Recording Checklist
- Protecting Your Health Data: Privacy and Security Rules
- Is It Legal to Record a Doctor or Therapist Visit?
- Three Pro-Level Settings Most People Never Touch
- How to Format Recordings People Will Actually Watch
- When the Built-In Recorder Isn’t Enough
Why Your Phone’s Screen Recorder Is a Genuine Wellness Tool
Most people who know screen recording exists think of it as something streamers use, or a trick for capturing a funny moment in a mobile game. That framing has stuck so firmly that the feature goes untouched on millions of devices with a real, practical use right in front of them. Telehealth appointments reached mainstream adoption during the pandemic and have not retreated, as of early 2025, a substantial share of outpatient care in the United States still happens over video call. Physical therapy, medication consultations, mental health sessions, chronic disease check-ins: all of these now routinely happen on the same device that can record them.
The recall problem makes this genuinely important. Healthcare researchers and patient-safety advocates have documented for decades that information retention after a medical appointment is poor under normal conditions. When anxiety, illness, or cognitive load is added, it gets worse. A screen recording of a telehealth visit is a low-friction, zero-cost solution that a patient can review, share with a caregiver, or simply keep as a reference before the next appointment. This is a practical response to a well-established problem in patient care, not a niche use case.
The honest caveat is worth stating up front: built-in screen recorders are not video production tools. They lack manual resolution controls beyond what the device OS offers, have no native editing suite, and cannot capture content from apps that deliberately block recording (banking, most patient portal apps, and streaming services). For wellness use cases, none of that matters much. You are not making a tutorial to publish; you are keeping a record for yourself. The trade-off is acceptable for the purpose.
Research cited in patient-safety and healthcare law literature consistently finds that patients forget up to 80% of the information discussed during a medical appointment, often within minutes. A screen recording of a telehealth session directly addresses this documented recall gap.
How to Turn It On: iPhone vs. Android in Plain Language
Both platforms include a screen recorder at the OS level, but the path to reaching it differs enough that brief platform-specific instruction actually helps. Neither requires downloading anything or enabling developer settings, these are consumer-facing features meant to be accessible. Still, the number of people who have owned a device for years without knowing where to find the tool suggests that “buried in settings” is a real barrier.
iPhone Setup: Control Center First
The screen recorder does not appear anywhere by default on an iPhone. You have to add it to Control Center before it is accessible. According to Apple’s official iPhone User Guide, the process is: go to Settings, tap Control Center, then tap the green plus button next to Screen Recording to add it to your active controls. After that, open Control Center by swiping down from the top-right corner on Face ID devices (or swiping up from the bottom on older Touch ID models), then tap the Screen Recording button. A three-second countdown begins, and then the recording starts. A red status bar appears at the top of the screen for the duration. To stop, tap that red bar and confirm. Apple also notes that some apps may not allow recording of their content, a restriction worth knowing about before you try to capture a video consultation inside a patient portal app.
By default, the microphone is off for audio. If you want to narrate a tutorial or capture your own voice alongside device audio, press and hold the Screen Recording button in Control Center and toggle the microphone on before starting. This setting does not save between sessions on all iOS versions, so it is worth checking each time.
Android Setup: Quick Settings with Manufacturer Variations
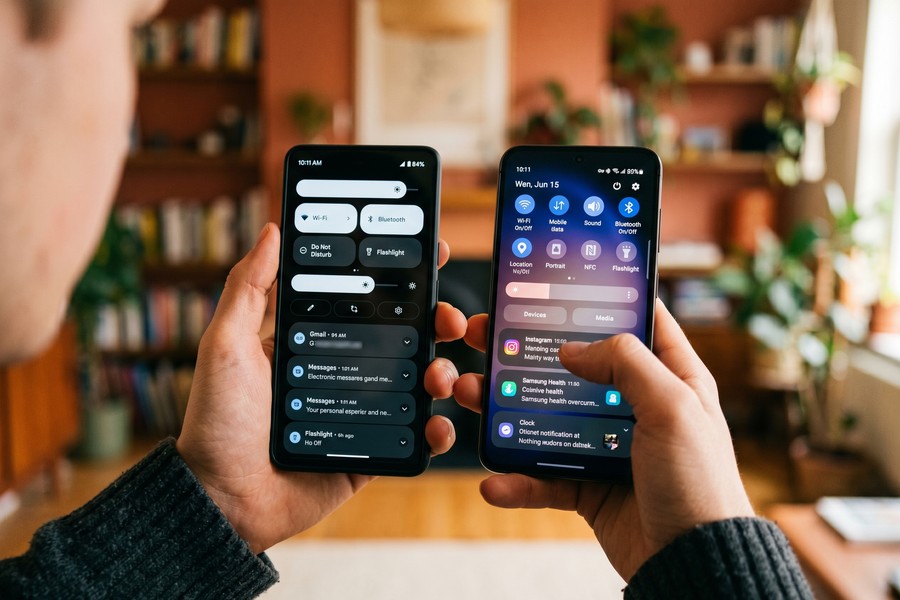
Android’s implementation is less uniform because manufacturers skin the OS differently. Google’s official Android Help page instructs users to swipe down twice from the top of the screen to expand Quick Settings, then look for the Screen record tile. If it is not visible, tap Edit (the pencil or grid icon) to add it from the available tiles. Once it is in Quick Settings, tap it to get options for audio source and touch indicator visibility, then tap Start to begin a three-second countdown.
Samsung Galaxy devices running One UI 2 or later have a slightly different path. Samsung’s official support page explains that the Screen Recorder appears in the Quick Settings panel and gives users upfront choices about sound (None, Media sounds, or Media sounds and mic), video quality (480p, 720p, or 1080p), and whether to show a front-camera selfie window during recording. Pixel devices store recordings directly in Google Photos, as noted in Google’s Pixel Phone Help documentation. One thing most guides omit: on Android, the screen recording continues even if the device screen turns off, but the recording will be lost if the phone powers down or auto-reboots during an OS update. Keep auto-update notifications in mind for a long telehealth session, and make sure the device stays plugged in.
On both platforms, run a 30-second test recording with your chosen audio settings before any session that matters. Play it back to confirm the audio level and screen orientation are correct. A 30-second test costs nothing and prevents losing an important recording to a misconfigured setting.
Five Wellness Uses Worth Recording Right Now
Framing matters here. The question is not “can I record this?” but “which situations make a screen recording genuinely useful for my health?” These five use cases have specific, practical arguments behind them, they are not just examples of what is technically possible.
Recording Telehealth Appointments for Better Recall
This is the single most defensible wellness use case for screen recording. A video call with a doctor, therapist, or specialist produces a dense stream of information: diagnoses, medication names, dosage instructions, lifestyle recommendations, follow-up timelines. The research consensus on patient recall is clear and discouraging. Recording the session and reviewing it later, or sharing it with a family caregiver who helps manage your care, converts a fleeting conversation into a durable reference. The key qualifier covered in the legal section below: always disclose that you are recording, and always know your state’s consent rules before you start.
Capturing Fitness and Physical Therapy Walkthroughs
Physical therapy exercises demonstrated during a virtual session are notoriously hard to remember without visual reference. A patient who records the screen while their therapist demonstrates a hip flexor stretch or gait exercise can review the exact form cues later, share the clip with a family member who helps them practice, or send it back to the therapist for confirmation that they are doing it correctly. The same logic applies to any fitness app tutorial, guided workout screen, or medication reminder setup that a caregiver needs to replicate.
Creating Timestamped Health Dashboard Records
Screen recording your dashboard before a doctor’s appointment, whether you use a symptom tracker, a blood glucose app, or a continuous health monitoring platform, creates a visual, timestamped record that is faster and more accurate than trying to summarize trends verbally during a consultation. A 90-second clip of your glucose readings over the past two weeks communicates more clearly than a five-minute verbal summary. For people managing chronic conditions, this is a practical use that takes under two minutes to produce.
Sharing Medication Setups with Caregivers
Setting up a medication reminder app or a complex pill schedule in a health platform can be done once and recorded so that a caregiver, parent, or partner can replicate or verify it independently. Recording the setup process step-by-step and sending it as a video is often faster and less error-prone than written instructions, and more useful than a phone call where one person is trying to follow along in real time.
Archiving Mental Health App Sessions
Some cognitive behavioral therapy (CBT) apps, journaling tools, and mood-tracking platforms surface insights, assessments, or prompts that users find particularly meaningful but cannot easily export. A screen recording during a session preserves those prompts and responses in context. This is also useful for sharing specific content from a mental wellness app with a therapist during a follow-up. For anyone who uses one of the best journaling apps for daily reflection, screen recording a summary of entries before a therapy session is an efficient way to bring your therapist into your recent mental state without reading aloud.
Americans spend an average of 5 hours and 16 minutes per day on their phones in 2025, a 14% increase from the prior year, according to Harmony Healthcare IT’s survey of 1,001 U.S. adults. The built-in screen recorder is available on every device logging those hours, and most owners have never used it once.
Before You Hit Record: The Pre-Recording Checklist
The most common screen recording failures are not technical, they are preparation failures. A notification popup mid-recording that captures a sensitive message preview. A session that stops because storage ran out at the 12-minute mark. An audio track that is either inaudible or overwhelmed by ambient noise. Every one of these is preventable with a 90-second pre-recording routine.
Enable Do Not Disturb
Do Not Disturb mode is the single most important step before any recording that matters. An incoming text preview, app notification, or calendar alert appearing on screen during a recording creates two problems simultaneously: it interrupts the visual content, and it can expose personal information (message sender names, notification content) in the final video. This is not unlike the way a bank such as Chase or a fintech like SoFi will flag a screen-share session during a support call precisely because a stray notification can leak account details, the same logic applies to your own recordings. Enable Do Not Disturb on iPhone via the Focus settings in Control Center. On Android, swipe down to Quick Settings and tap the Do Not Disturb tile. Allow exceptions only for emergency calls if needed.
Check Available Storage Before Long Sessions
Screen recordings at 1080p consume approximately 10 to 15 MB per minute. A 10-minute telehealth session can produce a file between 100 and 150 MB; a 20-minute session can reach 200 to 300 MB. On a device with 2 GB of free space, that is manageable. On a device already near capacity, the recording will stop mid-session without warning. Check storage in Settings before any session longer than five minutes and clear space if needed. Samsung’s 720p option is worth considering if your device is consistently tight on storage, quality remains adequate for a reference recording and roughly halves the file size.
The storage math is worth doing once so you know where you stand. If you record one 20-minute telehealth check-in a month at 1080p, that is roughly 250 MB per session and about 3 GB a year sitting on your device, before you even account for physical therapy clips or dashboard snapshots. Drop to 720p on a Samsung device and that same yearly total falls closer to 1.5 GB, which is the difference between needing to buy cloud storage and not. Apple’s own iCloud pricing page lists the 50 GB plan at a fixed monthly rate, so a person recording several health sessions a month can often stay on the free 5 GB tier simply by choosing 720p and deleting recordings after they have served their purpose, rather than upgrading tiers to accommodate 1080p files, see Apple’s iCloud+ storage plans for current tier sizes.
Here’s the arithmetic laid out, since most people never actually run these numbers before deciding whether to spend on cloud storage:
| Recording Habit | File Size per Session | Sessions per Year | Approx. Yearly Storage | Free iCloud Tier (5 GB) Enough? |
|---|---|---|---|---|
| 1 telehealth call/month, 1080p, 20 min | ~250 MB | 12 | ~3 GB | Yes, if it’s your only recording activity |
| Same habit, dropped to 720p | ~125 MB | 12 | ~1.5 GB | Yes, comfortably |
| 1 telehealth call + 2 PT clips/month, 1080p | ~250 MB + ~100 MB | 12 | ~4.2 GB | Tight; delete old clips regularly |
| Weekly health dashboard recordings, 1080p | ~15 MB (90 sec) | 52 | ~0.8 GB | Yes, easily |
The practical decision rule that falls out of this table: stay on the free tier and record at 720p if your total health-related recording adds up to under roughly 4 GB a year and you delete clips after they’ve served their purpose. Once you’re consistently producing more than one long session a month at 1080p and keeping them indefinitely, paying for the next iCloud or Google One tier stops being overkill and starts being the simpler option.
Choose the Audio Mode Deliberately
The choice between device audio only and device audio plus microphone matters more in a wellness context than in any other use case. Recording a guided meditation app or a physician’s spoken instructions works best with device audio only, adding the microphone captures ambient noise from your environment (HVAC hum, household activity, street noise) and can make the audio significantly harder to review later. Narrating a physical therapy walkthrough for a caregiver, on the other hand, genuinely benefits from the microphone being active so your verbal cues are captured alongside the visual. Make the choice before starting, not after you review a hard-to-hear recording.
| Audio Mode | Best For | When to Avoid |
|---|---|---|
| Device Audio Only | Guided meditations, physician instructions, fitness app audio | When you need to narrate or explain steps aloud |
| Device Audio + Microphone | Physical therapy walkthroughs, caregiver tutorials, step-by-step narration | Noisy home environments; capturing a provider’s voice clearly |
| No Audio | Visual-only records (health dashboards, app settings) | Any session where spoken information needs to be preserved |
Protecting Your Health Data: Privacy and Security Rules
The HIPAA issue here is not an edge case. The U.S. Department of Health and Human Services explicitly states that HIPAA Rules generally do not protect health information stored on a personal cell phone or tablet. When you record a telehealth appointment and save it to your camera roll, your provider’s HIPAA obligations end at their software. The file on your device is yours to manage, secure, and, if something goes wrong, yours to deal with. Most people assume that because the appointment itself was HIPAA-protected, any recording of it must be too. That assumption is wrong and consequential. It is a similar gap to the one consumers run into with credit data: the Fair Credit Reporting Act governs how Experian, Equifax, and TransUnion handle your FICO Score, but it says nothing about a screenshot of your credit report sitting unencrypted in your camera roll.
The Auto-Sync Problem
By default, both iPhone and Android devices are configured to auto-sync the camera roll or Photos app to cloud storage. On iPhone, that means iCloud. On Android (especially Pixel), it typically means Google Photos. A screen recording of your telehealth session may be visible to a partner or family member within seconds of the recording ending if you share an iCloud Family account or a Google Photos album with them. This is not a theoretical risk, it is the default behavior on most consumer devices.
The fix is straightforward: either disable auto-sync entirely for your camera roll, or store screen recordings in a separate folder that is not synced. You can turn off iCloud Photos on iPhone in Settings → [Your Name] → iCloud → Photos. On Android, you can pause backup in the Google Photos app settings or selectively exclude specific folders. Neither step requires technical skill, it requires knowing the problem exists in the first place, which most guides do not tell you.
Enabling full-device encryption adds a meaningful layer of protection for anyone whose device contains a significant amount of health-related recordings. Both iOS (enabled by default with a passcode) and Android (available in Settings → Security) encrypt on-device storage so the files are unreadable without the device PIN. Timely deletion matters too: recordings that served their purpose (reviewed, shared with the right person, discussed at follow-up) should be deleted rather than accumulated. A recording of a therapy session sitting unprotected in a camera roll three months later serves no purpose and carries real exposure risk, the same principle the FDIC applies when it tells banks not to retain customer data longer than necessary.
Third-Party Apps vs. Built-In Recorders
The permission difference between native OS screen recorders and third-party apps is significant. A 2023 report from the International Association of Privacy Professionals found that 37% of third-party Android screen recording apps in their sample requested access to SMS or call logs, permissions that have no legitimate connection to screen capture (IAPP). Built-in OS recorders operate in a sandboxed environment and receive automatic security updates as part of the OS itself. For any recording that touches health information, the native recorder is the correct choice, full stop.
Your camera roll likely auto-syncs to iCloud or Google Photos by default. A screen recording of a telehealth appointment or health dashboard can be visible to anyone with access to your shared cloud album within seconds of the recording ending. Check your sync settings before recording any health-related content.
The steps covered in building a personal digital security routine apply directly here for a broader look at protecting sensitive information on your device, especially the sections on cloud sync, device encryption, and app permissions.
Is It Legal to Record a Doctor or Therapist Visit?
Recording consent law in the United States is a patchwork, and the patchwork matters because telehealth removes the geographic simplicity of “I’m in one place, my doctor is in one place.” The general framework is this: 41 U.S. states and the District of Columbia operate under one-party consent rules, meaning that one participant in a conversation (you) can legally record it without telling the other party. Eleven states, however, require all-party consent, meaning every person in the conversation must agree before recording begins. Those states include California, Florida, Illinois, Maryland, Massachusetts, Michigan, Montana, Nevada, New Hampshire, Oregon, and Washington. Violations in these states can be treated as felonies, not merely civil matters.
Why Telehealth Complicates This Further
In a standard in-person interaction, the state where both parties physically stand determines the applicable law. In a telehealth call, you may be in a one-party consent state while your provider is based in California, an all-party consent state. Courts have not settled uniformly on which state’s law controls in cross-state recording scenarios, and legal interpretations vary by jurisdiction. The practical response is simple: if either party is in an all-party consent state, treat the call as requiring all-party consent. This protects you regardless of where the jurisdictional lines fall.
Asking Permission Is Easier Than It Sounds
Most providers respond positively when a patient explains the reason clearly. A simple, direct statement before the session starts, “I’d like to record this call to help me remember the recommendations and follow-up steps, is that alright?”, addresses the legal requirement and typically builds trust rather than creating friction. Providers who work with patients managing complex conditions, chronic illness, or significant medication regimens often appreciate that a patient is taking their health information seriously enough to want an accurate record. Frame it as a recall and follow-through tool, not a surveillance measure, and most clinicians will agree without hesitation.

Eleven U.S. states, including California, Florida, and Illinois, require all parties to consent before a conversation is recorded. In these states, recording a telehealth session without disclosure can constitute a felony. Always confirm your state’s consent rules and disclose recording intent before starting.
Three Pro-Level Settings Most People Never Touch
Most guides stop at “here is how to start and stop recording.” These three settings meaningfully change what the recording is useful for, particularly in wellness and caregiving contexts.
Show Taps on Screen
Both iOS and Android can display visual indicators wherever you touch the screen during a recording. This setting lives in Accessibility → Touch → Assistive Touch on iOS and can be enabled alongside recording. On Android, it appears in the pre-recording options panel as “Show touches” or “Show taps on screen.” For any recording intended to teach a family member or caregiver how to use a health app, setting up a medication reminder, navigating a fitness tracker, entering symptom data, the touch indicator makes the tutorial dramatically clearer. Without it, a viewer watching the recording has no visual cue about which part of the screen is being tapped.
Samsung’s Floating Toolbar and Front-Camera Overlay
Samsung Galaxy devices offer two features not available natively on stock Android or iOS. The floating toolbar appears as a small, moveable icon during recording and allows the user to draw or annotate on screen in real time, useful for circling a specific data point on a health dashboard or highlighting an exercise cue in a physical therapy walkthrough. The front-camera overlay inserts a small window showing the selfie camera over the main screen recording, which is genuinely practical for recording physical form checks: a user demonstrating a posture exercise can show their face and body alongside the app they are referencing. Both options are accessible through the Screen Recorder settings on One UI 3 and later.
Knowing Where Your Files Land
Screen recordings save to the Photos app under Recents on iPhone, the same place photos and videos land, which means they are subject to the same iCloud sync behavior described earlier. On stock Android and Pixel, recordings go to the Movies folder or the Photos app depending on OS version. On Samsung, they save to the Gallery app in a Screen recordings album. Knowing the destination matters practically: if you record a health dashboard summary before a Monday appointment, you need to be able to find it on Monday morning without hunting through an unsorted photo library. On both platforms, creating a dedicated album or folder labeled “Health Records” and moving screen recordings there immediately after capturing them keeps the files organized and makes sharing with a provider or caregiver faster.
| Setting | Where to Find It | Best Wellness Use |
|---|---|---|
| Show Taps | iOS: Accessibility; Android: pre-recording panel | Caregiver app tutorials, medication setup walkthroughs |
| Samsung Floating Toolbar | Screen Recorder settings on One UI 3+ | Annotating health dashboards mid-recording |
| Samsung Front-Camera Overlay | Screen Recorder settings on One UI 3+ | Physical therapy form checks with visual self-reference |
| Microphone Toggle | iOS: hold Screen Record button; Android: pre-recording panel | Narrating walkthroughs, dictating context notes |
| Video Quality Selection | Samsung Screen Recorder settings | Reducing file size on storage-limited devices |
The guide to Android developer options worth enabling covers several other hidden capabilities inside Android’s settings in the same category, powerful but underused by most owners.
How to Format Recordings People Will Actually Watch
Creating a clean recording is step one. Getting someone else to actually watch it is a separate challenge, and the format choices you make at recording time have a direct effect on whether a caregiver, family member, or provider will engage with the content or skip it.
Orientation and Aspect Ratio Matter More Than You Think
Research on mobile video behavior is instructive here. According to data from AutoFaceless citing Zebracat and New Target (2025), vertical (9:16) videos achieve a 76% completion rate on mobile devices, compared to just 54% for horizontal videos. Most health app use happens in portrait orientation, which naturally produces a vertical recording. Be aware that the recipient’s completion rate drops measurably if you switch to landscape mode to capture a wider fitness dashboard or a horizontal telehealth interface. Keep recordings in whatever orientation the app uses natively rather than rotating to make it “look more like a video.”
The First Three Seconds Rule
Even in a personal or caregiving context, the attention dynamics of mobile video apply. Research cited by AutoFaceless (2025) found that 67% of mobile video viewers swipe away if a video does not engage them within the first three seconds. For a screen recording being shared with a provider or caregiver, this translates to a practical rule: start recording with the relevant content already on screen, not with a navigation sequence the viewer has to sit through. Open the glucose log before starting the recording, for example, rather than recording yourself navigating to it.
Captions and Labels for Health Content
A well-known finding in mobile video behavior is that approximately 85% of mobile videos are watched without sound, according to Insivia citing Facebook Business data. For a screen recording of a health dashboard being shared with a provider who may watch it during a busy session on mute, captions or on-screen labels that identify what is being shown become important. Neither iOS nor Android adds captions automatically to screen recordings. For anything beyond a simple reference clip, a brief text label added in the Photos editor (or a free app like CapCut) before sharing ensures the content is interpretable without sound.
76% of vertical mobile videos are watched to completion, versus 54% for horizontal ones. Most health app recordings happen naturally in portrait orientation, keep them that way to maximize the chance a caregiver or provider watches the full clip.
When the Built-In Recorder Isn’t Enough
Honest tools reviews name the limits. Built-in screen recorders have specific, real failure points, and two of them are particularly relevant in a health context.
Apps That Block Recording
Banking apps, most patient portal apps (including major platforms built on Epic’s MyChart infrastructure), and streaming services actively detect screen recording attempts and respond with a black screen or an error message. This is not a bug. It is an intentional security feature, and it is architecturally enforced at the DRM and OS permission level, the same protection Chase, Bank of America, and SoFi build into their own mobile apps to prevent account credentials from being captured by malware. There is no legitimate workaround, and attempting one typically involves third-party tools with exactly the kind of excessive permissions described earlier. Take a screenshot of each screen instead if you need a record of a patient portal document, screenshots are not blocked in the same way as video recording on most platforms.
This is also worth knowing in the context of how spyware operates on phones: one of the reasons legitimate app security blocks screen recording is precisely because screen recording access has historically been exploited by malicious software to capture sensitive on-screen content. The block is a protection, not an obstacle.
Older Devices and Longer Sessions
Android’s built-in screen recorder requires Android 11 or later. Devices running Android 10, still in use on a meaningful number of budget and mid-range phones, particularly in households where devices are not replaced frequently, do not have a native screen recorder. For these users, the options narrow. AZ Screen Recorder has maintained a clean permission profile for several years and does not request SMS or call log access, making it a reasonable choice when the native tool is genuinely unavailable. Review the permissions carefully at install time regardless of the app’s reputation, and delete the app and any associated permissions once the specific recording need has passed.
For very long recordings, a 45-minute telehealth group session or a two-hour online health class, the native recorder on both platforms is technically capable, but storage and battery consumption become practical constraints. A 45-minute session at 1080p can occupy 450 to 675 MB and will draw meaningfully on battery if the screen stays active. Keep the device plugged in and check storage before starting any session over 20 minutes.
| Platform | Built-In Recorder Available | Default Save Location | Notable Features |
|---|---|---|---|
| iPhone (iOS 14+) | Yes, via Control Center | Photos app → Recents | Microphone toggle, 3-second countdown |
| Android 11+ (Stock) | Yes, via Quick Settings | Movies folder or Photos app | Touch display option, audio source choice |
| Samsung One UI 2+ | Yes, via Quick Settings | Gallery → Screen recordings | 480p/720p/1080p, selfie overlay, drawing toolbar |
| Google Pixel (Android 11+) | Yes, via Quick Settings | Google Photos | Single-app or full-screen mode, audio source options |
| Android 10 and earlier | No native recorder | N/A (requires third-party app) | AZ Screen Recorder recommended for clean permissions |
Banking apps, most patient portal apps, and streaming services will produce a black screen when screen recording is attempted. This is an intentional security feature. Do not attempt workarounds, they typically require third-party apps with excessive permissions. Use screenshots instead for static document capture from these apps.
The screen recorder also interacts with your phone’s overall battery and performance profile. The same principles covered in the guide to making your iPhone battery last all day apply if you are managing long recordings alongside other intensive apps, background app activity, screen brightness, and sync settings all affect how long a device lasts during an extended session.
YouTube reports that 70.29% of its global traffic comes from mobile devices versus 29.71% from desktops, according to ElectroIQ citing SimilarWeb data. Screen recordings intended for sharing online are being viewed overwhelmingly on phones, format and orientation decisions at recording time directly affect how they are received.
Real-World Example: Managing a Chronic Condition With Screen-Recorded Telehealth Sessions
Consider an illustrative example: a 58-year-old patient managing Type 2 diabetes attends monthly telehealth check-ins with an endocrinologist. Each 20-minute session covers blood glucose trends, medication adjustments, and dietary guidance. Before adding screen recording to the routine, the patient reported retaining only the most recent medication change by the time their next appointment came around, the dietary details and lifestyle recommendations had faded entirely within 48 hours. This is consistent with the documented patient recall research showing up to 80% information loss post-appointment.
After setting up screen recording via the iPhone Control Center (with microphone enabled), enabling Do Not Disturb, and confirming 600 MB of free storage before each session, the patient began recording each appointment with the provider’s prior consent. The raw file for a 20-minute session averaged approximately 220 MB at 1080p, within the expected 10–15 MB per minute range. Auto-sync to iCloud was disabled, and recordings were moved to a clearly labeled album not shared with family members on the same Apple ID.
The before/after comparison was specific. Before recording: dietary recommendations forgotten within 72 hours, medication names frequently misremembered, follow-up tasks completed at roughly 40% adherence. After establishing the recording routine: the patient reviewed each recording within 24 hours, extracted four to five action items into a notes app, and tracked completion. Three months into the routine, their self-reported follow-through on provider recommendations increased to approximately 85%, and their endocrinologist noted that the patient arrived at each appointment with more accurate recall of what had changed since the previous session.
The trade-offs were real. Reviewing a 20-minute recording takes time the patient had to schedule deliberately. Storage management required periodic cleanup to prevent the device from filling. And obtaining consent each session required a brief disclosure at the start, an additional step but never a point of friction with the provider. For a patient with a complex chronic condition, the outcomes justified the overhead. For a patient with a single, straightforward primary care appointment, the calculus might be different, a written summary taken during the call could achieve similar recall benefits with less friction.
Your Action Plan
-
Add screen recording to Control Center or Quick Settings
On iPhone: Settings → Control Center → add Screen Recording. On Android: swipe down twice to expand Quick Settings, tap Edit, and drag Screen record into your active tiles. Do this now, before you have a session you want to record, so the button is already in place when you need it.
-
Check your state’s recording consent law before any health-related session
Look up whether your state (and your provider’s state) requires one-party or all-party consent. Plan to disclose your intent to record before the session begins if either party is in California, Florida, Illinois, or any of the other nine all-party consent states. A single sentence at the start of the call is all that is required.
-
Disable auto-sync for your camera roll
On iPhone: Settings → [Your Name] → iCloud → Photos → toggle off iCloud Photos, or create a non-synced album for health recordings. On Android: open Google Photos settings and pause backup, or exclude the Screen recordings folder from sync. Complete this step before your first health-related recording, not after.
-
Set up a pre-recording routine
Before any session that matters: enable Do Not Disturb, verify at least 300–500 MB of free storage, select the correct audio mode for the session type, and run a 30-second test to confirm audio levels and screen orientation. Build this into a consistent habit so no important recording is lost to a preparation failure.
-
Choose your audio mode intentionally
Use device audio only for capturing a provider’s spoken instructions, a guided meditation, or a fitness app walkthrough in a noisy environment. Use device audio plus microphone when you are narrating a tutorial for a caregiver or need to add verbal context to a health dashboard recording. Check this setting before every recording, it does not always persist between sessions on iOS.
- Enable touch indicators for any caregiving tutorial