Fact-checked by the Snapmessages editorial team
Quick Answer
To complete a smart doorbell setup without professional help, you need to choose a compatible device, check your existing wiring or opt for a battery-powered model, download the companion app, and mount the unit at the correct height., most homeowners finish the entire installation in under 30 minutes, spending an average of $100–$250 on a quality device.
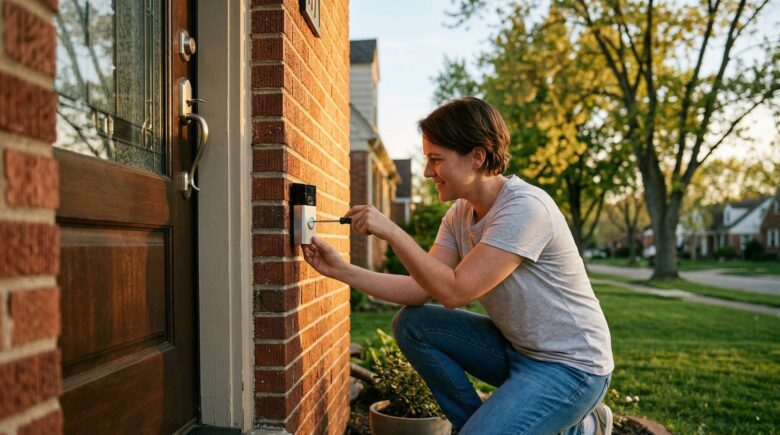
Setting up a smart doorbell yourself is genuinely not that hard., the whole process typically takes under 30 minutes from unboxing to watching your first live video feed. A smart doorbell setup means picking between a wired or battery-powered model, downloading the manufacturer’s app, mounting the device at the correct height, and connecting it to your home Wi-Fi, no licensed electrician required for most of this. According to Statista’s smart home market data, the global smart doorbell segment is projected to surpass $2.8 billion in revenue by 2026, which reflects just how normal DIY installation has become.
Manufacturers like Ring, Google Nest, Arlo, and Eufy have spent years deliberately engineering these devices for tool-free or minimal-tool installation. Guided setup apps, modular mounting hardware, color-coded wiring, they’ve stripped out almost every reason you’d need to call a professional. With package theft climbing and front-door security on everyone’s mind, handling this yourself is the practical choice for most homeowners.
One honest caveat before you start: smart doorbells are not a great fit for every situation. Renters in buildings with strict exterior modification rules may be limited to peephole-style cameras or adhesive mounts with minimal field of view. Homes with older wiring, particularly those built before 1980, may need a transformer upgrade before any wired model will function reliably. And if your front door Wi-Fi signal is weak, the camera will buffer, miss motion events, and frustrate you regardless of which brand you choose.
This guide is written for homeowners and renters who want to install a smart doorbell without hiring an electrician. By the end, you’ll know exactly how to assess your wiring, pick the right device, mount it securely, connect it to your network, and lock down the account keeping your camera footage private.
Key Takeaways
- Most DIY smart doorbell installations take 30 minutes or less, according to setup guides from Ring and Google Nest, no electrician needed for battery-powered models.
- Wired doorbells require a transformer supplying 16–24 volts AC; using a lower-voltage transformer is the leading cause of wired doorbell failure, per CNET’s smart doorbell testing data.
- Mounting height matters: the optimal camera position is 48 inches (4 feet) from the ground, which captures both face-level and package-drop views without distortion, as recommended by Ring’s installation documentation.
- Using a weak password or no two-factor authentication on your doorbell account leaves live footage vulnerable, a 2023 FTC report found that over 60% of compromised IoT devices had default or weak credentials at the time of breach.
- Battery-powered smart doorbells typically last 1–6 months per charge depending on motion activity, Wi-Fi signal strength, and temperature, according to Wirecutter’s long-term doorbell testing.
- Renters can legally install most battery-powered or adhesive-mount doorbells without drilling, but should always confirm lease terms before mounting any device to exterior walls or door frames.
In This Guide
- Step 1: How Do I Choose the Right Smart Doorbell for My Home?
- Step 2: Do I Need Existing Wiring for a Smart Doorbell?
- Step 3: How Do I Set Up the App and Create My Account?
- Step 4: How Do I Mount a Smart Doorbell at the Right Height and Angle?
- Step 5: How Do I Connect My Smart Doorbell to Wi-Fi?
- Step 6: How Do I Configure Motion Zones and Alert Settings?
- Step 7: How Do I Keep My Smart Doorbell Camera Secure?
- Frequently Asked Questions
Step 1: How Do I Choose the Right Smart Doorbell for My Home?
The right smart doorbell comes down to three things: your existing wiring situation, whichever smart home ecosystem you’re already using, and what you’re willing to spend. Wired models like the Ring Video Doorbell Pro 2 and Google Nest Doorbell (Wired) give you continuous power and uninterrupted live streaming. Battery models, the Ring Video Doorbell 4, the Arlo Essential Video Doorbell, need zero wiring but will ask you to recharge them every few months.
How to Choose
Before you buy anything, answer these questions honestly:
- Do you have an existing doorbell with wiring? If yes, a wired model will give you the best performance.
- Are you renting, or does your door frame lack wiring? A battery-powered or plug-in model is your best option.
- Do you use Amazon Alexa, Google Home, or Apple HomeKit? Choose a device that natively supports your ecosystem.
- Do you want 24/7 continuous recording, or is motion-triggered recording enough?
According to Wirecutter’s independent testing, the Ring Video Doorbell 4 is the best all-around option for most buyers at around $100. If you’re deep in the Google ecosystem and want smart package detection, the Google Nest Doorbell (Wired) at roughly $180 processes AI on-device, a meaningful distinction from cloud-dependent competitors.
What to Watch Out For
Don’t buy a doorbell locked behind a subscription plan if free local storage matters to you. Several Eufy and Arlo devices store footage locally via a home base unit, no monthly bill. Ring and Nest charge monthly for cloud storage once your short trial period ends. That’s not a dealbreaker, just something worth knowing before your credit card is already out.
There’s also a real ecosystem lock-in tradeoff here. Ring works best with Amazon Alexa; Google Nest integrates tightly with Google Home; Apple HomeKit users will find the options considerably narrower. Switching ecosystems later means replacing hardware, not just accounts.
If you are already a Prime member, Ring’s subscription plan is included at a reduced rate through the Ring Protect Plus plan. But if you value privacy and want zero cloud dependency, Eufy’s battery doorbells store footage locally on an encrypted home base, no monthly fee required.
| Model | Power Type | Resolution | Storage | Price (2025) | Best For |
|---|---|---|---|---|---|
| Ring Video Doorbell 4 | Battery or Wired | 1080p HD | Cloud (Ring Protect, $3.99/mo) | ~$100 | Amazon Alexa users |
| Google Nest Doorbell (Wired) | Wired only | 960 x 1280 (HDR) | Cloud (Nest Aware, $6/mo) + 1hr free | ~$180 | Google Home users |
| Arlo Essential Video Doorbell | Battery or Wired | 1536p | Cloud (Arlo Secure, $2.99/mo) + free tier | ~$100 | Wide-angle coverage |
| Eufy Video Doorbell E340 | Wired | 2K Dual-Cam | Local (16GB internal, free) | ~$130 | Privacy-first homeowners |
| Ring Battery Doorbell Pro | Battery | 1536p HD+ | Cloud (Ring Protect, $3.99/mo) | ~$130 | No-wiring premium features |
Step 2: Do I Need Existing Wiring for a Smart Doorbell?
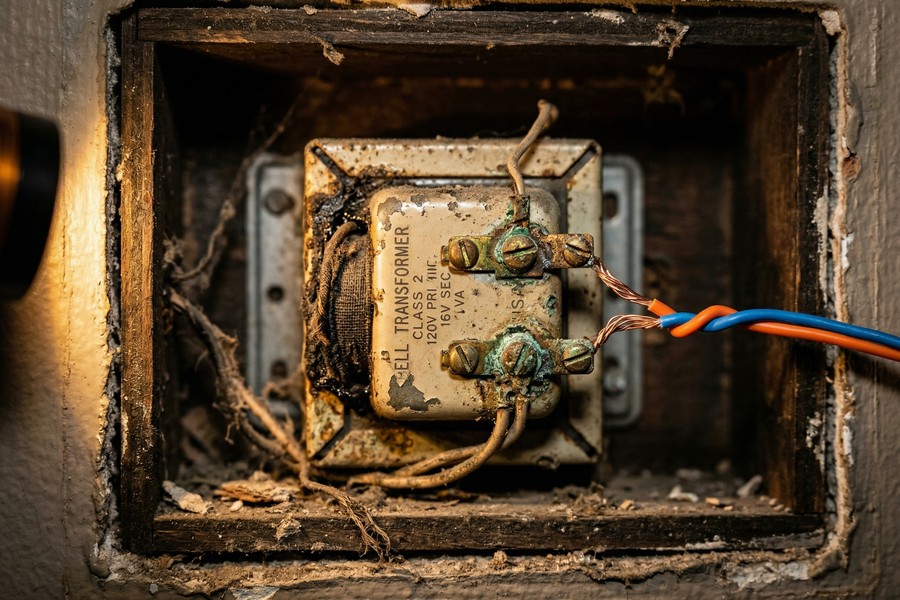
Short answer: no. You don’t need existing wiring to install a smart doorbell. If you already have a traditional wired doorbell, using that wiring will deliver noticeably better performance. Wired smart doorbells need a compatible transformer supplying 16–24 volts AC at 10–40 VA, and most homes built after 1980 already meet that spec.
How to Check Your Wiring
Follow these steps to figure out whether your existing doorbell wiring is actually compatible:
- Locate your indoor chime unit (usually a box on a hallway wall).
- Remove the chime cover and look for a label on the transformer, it will show voltage (V) and volt-amperes (VA).
- If the transformer reads 16V or higher, you are ready for a wired smart doorbell.
- If it reads 8V or 10V, you will need to replace the transformer, a straightforward swap available at hardware stores for under $20.
No existing doorbell wiring at all? Grab a battery-powered model and skip this whole section. No transformer, no wiring, no electrician.
What to Watch Out For
A trap people fall into constantly: assuming that because the old doorbell worked fine, the transformer must be up to spec. It often isn’t. Older transformers rated at 8V–10V are common in homes built before 1990, and they will cause a wired smart doorbell to malfunction, flash error lights, or simply refuse to charge its internal battery. Check the label. It takes thirty seconds.
Before touching any wiring, turn off the doorbell circuit at your home’s breaker panel. Doorbell circuits operate at low voltage but the transformer itself connects to 120V household current. Always verify the breaker is off before disconnecting any wires from the chime unit or doorbell button.
Step 3: How Do I Set Up the App and Create My Account?
Download the app before you touch a single screw. Creating a secure account is the essential first step before you physically install anything. Every major smart doorbell brand, Ring, Google Home, Arlo, Eufy, SimpliSafe, uses a companion app to walk you through setup and get the device talking to your network.
How to Do This
Here is the standard process across all major brands:
- Download the official app from the Apple App Store or Google Play Store. Search for the exact brand name, Ring, Google Home, Arlo, or Eufy Security.
- Tap “Create Account” and enter your email address and a strong, unique password. Do not reuse a password from another account.
- Verify your email address via the confirmation link sent to your inbox.
- Enable two-factor authentication (2FA) immediately, this is the single most important security step you can take. Most apps prompt you to enable it during account creation.
- Grant the app permissions for notifications, camera access (for QR scanning during setup), and location if prompted.
Need help coming up with a password you’ll actually remember? Our guide on setting a strong password you can actually remember is worth a read before you store any credentials linked to a home camera.
What to Watch Out For
Only download from the official app store. No APK sideloading, no third-party sources. Fake versions of popular smart home apps have been used to harvest login credentials, and the Ring app has over 10 million installs on Google Play, which makes it a frequent target for imitation apps with nearly identical names. If something looks slightly off about the app icon or developer name, close it immediately.
Enabling two-factor authentication on your smart doorbell account adds a critical layer of protection that prevents unauthorized access even if your password is stolen. Our explainer on what two-factor authentication is and why you should use it walks through every method, from SMS codes to authenticator apps.
Step 4: How Do I Mount a Smart Doorbell at the Right Height and Angle?
Mount your smart doorbell at 48 inches (4 feet) from the ground. At that height you’ll capture both face-level and package-drop views without wasting half the frame on sky or concrete. Ring and Google Nest both specify this exact measurement in their official installation documentation, and there’s a good reason they agree on it.
How to Do This
Gather the tools included in your doorbell’s box, most kits include a mounting bracket, screws, a drill bit, a level, and a corner wedge kit for angled installations.
- Use a tape measure to mark 48 inches from your doorstep on the door frame or adjacent wall.
- Hold the mounting bracket against the wall at that mark and use the included level to ensure it is perfectly straight.
- Mark the screw holes with a pencil.
- If mounting into wood, drill pilot holes using the included bit. For brick or stucco, use the included masonry drill bit and anchors.
- Attach the bracket with screws. For wired installations, feed the two doorbell wires through the central hole in the bracket before securing it.
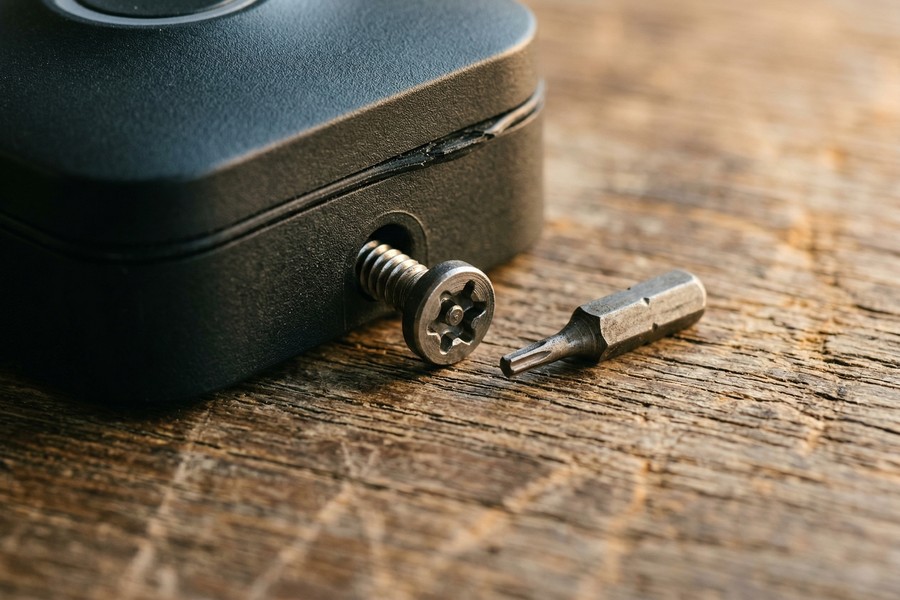
- Attach the doorbell unit to the bracket. Most models click or slide into place, then secure with the included security screw at the base.
If your front path approaches at an angle, and many do, use the angled wedge mount that comes in most kits. It redirects the camera’s field of view by 15–30 degrees, covering your entire walkway instead of pointing uselessly into the street.
What to Watch Out For
Don’t skip the security screw at the base. That small screw requires the included proprietary screwdriver bit, and without it the doorbell can be pulled off by hand, a common porch piracy move that targets unsecured units specifically.
Mounting too high is the single biggest installation mistake homeowners make. At 6 feet or above, the camera captures the tops of heads rather than faces, making footage far less useful for identification. According to Ring’s official installation documentation, four feet is the right position for capturing both faces and packages in a single frame. This is consistent across Ring, Google Nest, and Arlo’s published setup guides.
According to the Bureau of Justice Statistics household burglary data, 34% of burglars enter through the front door, making a front-facing smart doorbell camera one of the highest-impact security investments available to homeowners.
Step 5: How Do I Connect My Smart Doorbell to Wi-Fi?
Connecting your smart doorbell to Wi-Fi is handled entirely through the companion app. There’s a guided setup wizard, and you don’t have to manually enter anything on the device itself. The whole thing typically takes under 5 minutes on a stable 2.4 GHz or 5 GHz network, genuinely one of the easier parts of this process.
How to Do This
Open your brand’s app and follow the in-app prompts. The standard process looks like this:
- Tap “Set Up a Device” or “Add Device” in the app’s home screen.
- Scan the QR code on the back of your doorbell using your phone’s camera when prompted.
- The app will place the doorbell into pairing mode, usually indicated by a spinning light on the device.
- Select your home Wi-Fi network from the list. Most doorbells support 2.4 GHz and 5 GHz bands, if your router shows both, choose the 5 GHz option if the doorbell is within 30 feet of your router, or 2.4 GHz for greater range through walls.
- Enter your Wi-Fi password. The app transmits it securely to the device during pairing.
- Wait for the app to confirm a successful connection, usually shown by a solid light on the doorbell and a success screen in the app.
Running a mesh network? Eero, Google Nest WiFi Pro, Orbi, connect the doorbell to whichever node sits closest to your front door. A signal strength below -70 dBm at the doorbell’s location will cause video buffering and missed motion alerts, and that’s a frustrating problem to troubleshoot after the fact.
What to Watch Out For
Don’t connect your smart doorbell to a guest network with client isolation enabled, that setting blocks the app on your phone from communicating with the device entirely. Connect both your phone and the doorbell to the same primary network during setup. You can move the doorbell to an IoT-dedicated VLAN later if your router supports network segmentation, but sort that out after you’ve confirmed everything works first.
Run a free Wi-Fi signal strength test at your front door before installation using apps like WiFi Analyzer (Android) or Network Analyzer (iOS). If signal strength is below -65 dBm, consider placing a Wi-Fi range extender or mesh node closer to the door before completing your smart doorbell setup.
Step 6: How Do I Configure Motion Zones and Alert Settings?
Skip this step and you will regret it within 48 hours. Configuring motion zones is what stops your doorbell from pinging you every time a car drives past or a tree branch moves in the wind. All major smart doorbells let you draw custom motion zones directly in the app, and this five-minute task separates a useful device from an annoying one.
How to Do This
In your doorbell’s app, navigate to “Device Settings” then “Motion Settings” or “Smart Alerts.” The steps are nearly identical across Ring, Nest, Arlo, and Eufy:
- Tap “Motion Zones” to see a live view or snapshot of your camera’s field of view.
- Draw a polygon or drag sliders to define the active detection area, typically your walkway, porch, and immediate yard.
- Exclude the road, neighbor’s driveway, or busy sidewalk to reduce false alerts.
- Set motion sensitivity to “Medium” as a starting point, adjust up or down based on the false alerts you receive over the first week.
- Enable “Person Detection” or “Smart Detection” if your device supports it. This uses AI to distinguish between people, vehicles, and animals, reducing irrelevant notifications significantly.
- Configure “Quiet Hours” to suppress notifications during overnight hours if your doorbell faces a street with overnight traffic.
Worth noting: Google Nest Doorbell’s on-device processing can tell apart people, packages, animals, and vehicles without a paid Nest Aware subscription. If you want smart filtering without an ongoing monthly bill, that’s a meaningful advantage over most competitors.
What to Watch Out For
Setting sensitivity too high in a busy neighborhood causes “alert fatigue” fast. You start dismissing notifications, then disabling them entirely, and suddenly you’ve spent $130 on a device you’ve effectively turned off. Start at medium, check your alert history after 48 hours, and adjust from there. According to Wirecutter’s long-term testing, motion zone configuration is the step most users skip and most frequently blame for poor device performance afterward.
Step 7: How Do I Keep My Smart Doorbell Camera Secure?
Securing your smart doorbell account is a required step, not an optional one. A 2023 FTC report on IoT security found that default or weak credentials were the primary attack vector for compromised home cameras. You’ve gone to the trouble of installing this device, don’t leave the front door of your front-door camera wide open.
How to Do This
Follow these five security steps immediately after completing your smart doorbell setup:
- Enable two-factor authentication (2FA) in your account settings. Use an authenticator app like Google Authenticator or Authy rather than SMS-based codes where possible, SMS 2FA can be bypassed via SIM swap attacks, a growing threat to smart home account security.
- Change your Wi-Fi router’s default admin password if you haven’t done so already. Your doorbell is only as secure as the network it connects to.
- Keep firmware updated. Both the doorbell app and the device firmware release security patches regularly. Enable automatic updates in the app settings.
- Review shared access. If you have shared access with family members or a property manager, audit the list and remove anyone who no longer needs it.
- Disable public sharing features like Ring’s Neighbors app or Nest’s community sharing unless you actively want your footage visible to others on the platform.
For a more detailed look at protecting all your connected home accounts, our guide on how to secure your personal data after a breach walks through the exact steps to take if any of your credentials are ever exposed.
What to Watch Out For
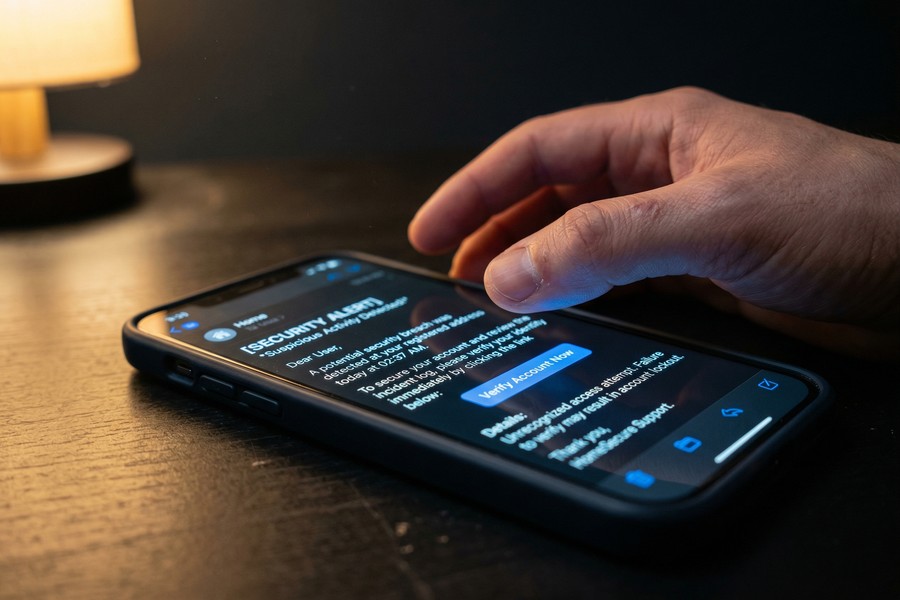
Phishing emails impersonating Ring, Google, and Arlo are genuinely common, always log in through the official app, never by clicking a link in an email. Our explainer on smishing and text-based scams covers exactly how attackers use SMS and email lures to steal smart home credentials. Worth reading before you assume that “urgent security notice” in your inbox is real.
Do not share your doorbell app login credentials with neighbors, housekeepers, or contractors. Instead, use the app’s built-in “Shared Users” or “Guest Access” feature, this gives them limited access without exposing your master account credentials or payment information.
Frequently Asked Questions
Can I install a smart doorbell in a rented apartment without damaging anything?
Yes, battery-powered smart doorbells can be installed in rentals using adhesive mounting strips or no-drill wedge mounts that leave no permanent damage. The Ring Peephole Cam is worth knowing about here; it replaces a standard door peephole entirely, no drilling whatsoever. Always read your lease before mounting anything to an exterior wall, since some landlords prohibit modifications to shared building exteriors even when they’re technically reversible.
What Wi-Fi speed do I need for a smart doorbell to work properly?
A minimum of 2 Mbps dedicated upload bandwidth is required for reliable smart doorbell video streaming. Most modern broadband connections exceed that easily. The real culprit is usually weak Wi-Fi signal at the front door, not your internet plan. If your doorbell sits more than 50 feet from your router with multiple walls in the way, a Wi-Fi extender or mesh node near the entrance will solve buffering far faster than any plan upgrade.
How long does a battery-powered smart doorbell battery last before it needs recharging?
Battery life on most smart doorbells ranges from 1 to 6 months per charge, depending on motion frequency, video resolution, Wi-Fi signal quality, and ambient temperature. Cold weather, below 32°F (0°C), can reduce battery capacity by up to 40%, according to Ring’s official battery care documentation. High-traffic locations with frequent motion events will drain the battery faster than quiet rural homes.
Do smart doorbells work without a subscription?
Yes, most smart doorbells offer basic functionality without a paid subscription, including live view, two-way audio, and real-time motion alerts. However, cloud video storage and advanced AI features like person or package detection typically require a paid plan ranging from $2.99 to $10 per month. Eufy doorbells are a notable exception, offering free local storage on-device or via a home base unit with no monthly fee.
Why is my smart doorbell not connecting to Wi-Fi during setup?
The most common cause of Wi-Fi connection failure during a smart doorbell setup is trying to join a 5 GHz-only network on a device that only supports 2.4 GHz. Check your router settings to confirm both bands are active and that your network name (SSID) doesn’t include special characters, those can cause pairing failures that are maddening to diagnose. Also check whether your router’s firewall is blocking the doorbell’s outbound connection; temporarily disabling MAC address filtering during initial setup often fixes the issue immediately.
Can I use a smart doorbell without an existing chime, or do I need to keep the old one?
You don’t need to keep your existing mechanical chime at all. Every major brand includes a configurable in-app chime that plays through your smartphone or a connected smart speaker like an Amazon Echo or Google Home. If you want an audible in-home chime that rings even when your phone is silenced, most wired models support connecting to your existing chime box, or you can pick up an optional plug-in chime unit for under $30.
Is it safe to leave my smart doorbell footage stored in the cloud?
Cloud storage from major providers like Ring (Amazon), Google Nest, and Arlo uses AES-256 encryption in transit and at rest, the same standard used by major financial institutions. The greater risk is account-level breaches caused by weak or reused passwords. Enable two-factor authentication, use a unique password, and cloud storage risk drops substantially.
Should I get a doorbell with a built-in siren or just video?
A doorbell with a built-in siren actively deters rather than just records. Models like the Ring Video Doorbell Pro 2 and Arlo Essential Video Doorbell include this feature and can trigger an audible alarm when motion is detected or a button is held. For most homeowners who already have a separate alarm system, video-only is perfectly sufficient. If your smart doorbell is your only security hardware, the siren is worth having.
Will a smart doorbell work if my internet goes down?
Mostly no. If your internet goes down, most smart doorbells will not record, stream, or send alerts, they’re entirely dependent on a live connection. Some devices with local storage, like the Eufy Video Doorbell, will keep recording to onboard memory during an outage, which is a real advantage. And if you kept your traditional wiring and chime unit in place, the physical button will still ring the chime the old-fashioned way.
Do smart doorbells work with Apple HomeKit?
Apple HomeKit support is far more limited than Amazon Alexa or Google Home compatibility. As of early 2026, the Logitech Circle View Doorbell remains one of the only video doorbells with full native HomeKit support. Ring and Google Nest do not support HomeKit directly. If your home runs on Apple devices and you want Siri controls or HomeKit Secure Video storage in iCloud, your hardware choices are genuinely narrower, that’s a real tradeoff worth knowing before you buy.
Can smart doorbells be hacked?
Yes, any internet-connected device can be compromised if account security is weak. The 2023 FTC IoT security findings cited default or reused passwords as the primary factor in over 60% of compromised smart home cameras. Ring specifically faced scrutiny in 2019 after reports of unauthorized account access due to credential stuffing attacks, which led the company to make two-factor authentication more prominent in its setup flow. Strong, unique passwords and 2FA on your Ring, Nest, Arlo, or Eufy account are your best defenses.
Sources
- Bureau of Justice Statistics, Victimization During Household Burglary
- Ring, Official Installation Documentation and Mounting Height Guidelines
- Google Nest, Doorbell Product Page and Setup Documentation
- Arlo, Essential Video Doorbell Product and Setup Information
- Eufy, Video Doorbell E340 Local Storage Specifications
- NIST, Cybersecurity Framework for IoT and Connected Devices
- Apple, HomeKit Developer Documentation and Compatible Accessories